Pages

Showing posts with label Beads. Show all posts

Wednesday, 7 August 2019

Ring Ring Ringa……..

Tatting on Rings⭘ ▢ △ ◊ ⬯.................
I have been working on new jewelry patterns using metal rings of different sizes from
2,3,4 mm to 38mm and also in different shapes e.g. round, teardrop diamonds etc.
Sharing here my new danglers using Puff pattern.
'Puff ' - The shape formed inside the ring due to gathering and twisting of threads while
weaving on the ring.
The earrings posted here are tatted with Anchor 20 thread.
(1)Puff Ring Danglers A-The Puff is made by tying thread in the center.
Ring size-18mm
(2)Puff Ring Danglers B-The big eyed bead is added while weaving the Puff.
Ring size- 28mm
   
(3) Puff Teardrop Danglers - Teardrop shaped Ring Size - 25mmX15mm
(4) Puff Diamond Danglers - Diamond shaped Ring Size- 8mmX8mm
Working of the Puff- Ring Size- 22mm
Note: *Thickness of the Puff varies with number of thread insertions. 
             *These insertions depend on the bead eye size.
     
Make a pair this way and you get ……….. 
                               
The working pics will help you try out my Puff Danglers pattern.

Any suggestions, queries and comments are welcome.

⧪⧪⧪......HAPPY TATTING......⧪⧪⧪

Saturday, 25 May 2019

Tatting along the Guchhas!!!!

Another great day for Indian Tatting Group 'Happy Tatters' !!!
There was an overwhelming response from enthusiastic tatters for a tat along pattern of.........
                                     Guchha Earrings . 
The tat along session was taken up by our most loving senior tatter Madhur .
She has her own unique style of explanation and demonstration.
Each participant came up with lovely combination of threads and beads.
First Session entries 
Second Session postings 
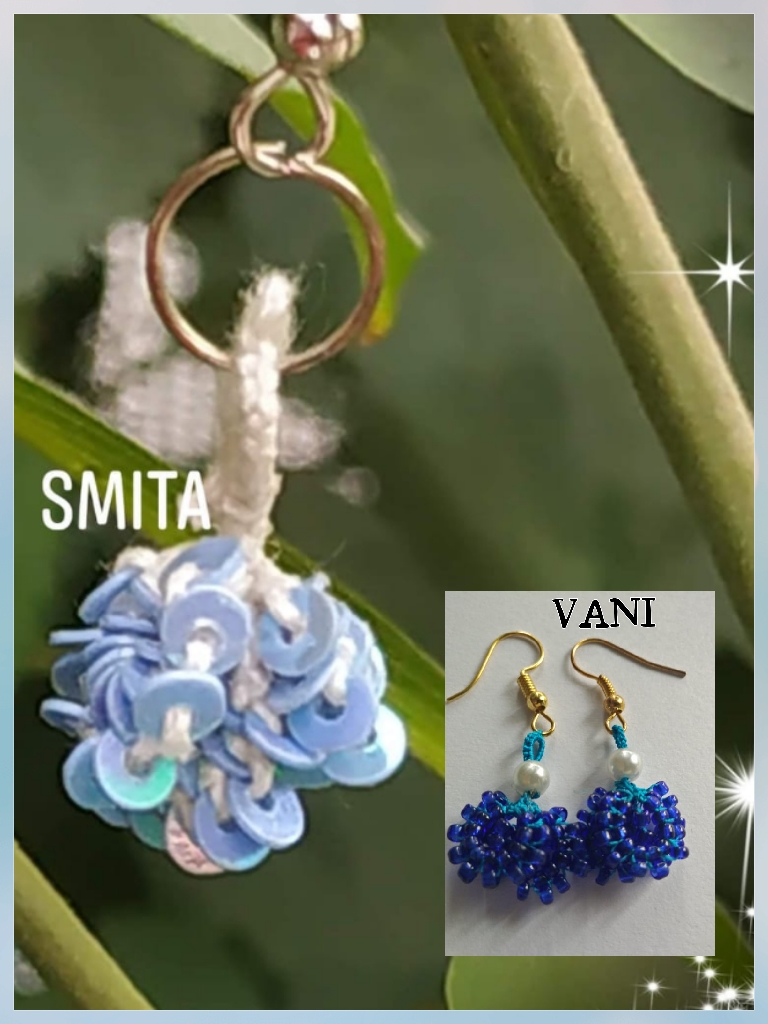
Specially clicked close up of Guchhas with sequins by Smita 
Sujatha tatted Guchhas with graded rings on Vandana's suggestion. That came out fabulous too. 
I thank all my tatter friends for their wholehearted participation🙏

So do you also feel like tatting the Guchhas now??????😃
Do mail me your experiments and variations.
And yes, your comments and suggestions too. 

🔶🔶🔶HAPPY TATTING 🔶🔶🔶


Sunday, 21 April 2019

Beaded Beauties..1

My bead mania continues😀......
with Guchha Earrings
These beaded earrings perfectly named as 'Guchha' by my dear tatter friend Madhur and I loved the name😍
The meaning of the word 'guchha' in Indian language is a bunch of flowers or fruits, tied together or growing on the same stem.
I tried to replicate this nature's pattern in my tatting.
These 'guchhas' are tatted in easy steps using single shuttle.
Here is a step by step pictorial..........
1. First ring tatted using seed beads on ring and shuttle thread.
2. Tat two more rings similar way. 
3. Tie up all three rings and tat a big ring with a picot to attach a finding.
Here are some variations with different color combinations and bead sizes for you

Enjoy tatting with beads😀😀


Happy Tatting..........


Wednesday, 3 April 2019

Beaded beauties

Lanyards are tatted using 1,2 mm glass beads with single shuttle. I have tried to tat rings of 3 and 4 double stitches as per bead size. These rings are snugged in such a way that they resemble the consecutive real glass bead.
The Dark Blue and the red lanyards are tatted using 1mm beads with rings of 3ds and the Sky Blue 2mm beads with rings of 4ds.
This Black lanyard with white transparent glass beads is currently in progress. These are 1mm beads with rings of 3ds.
Close up of the work

Happy Tatting................😀


Wednesday, 24 October 2018

Nothing Trembles!!

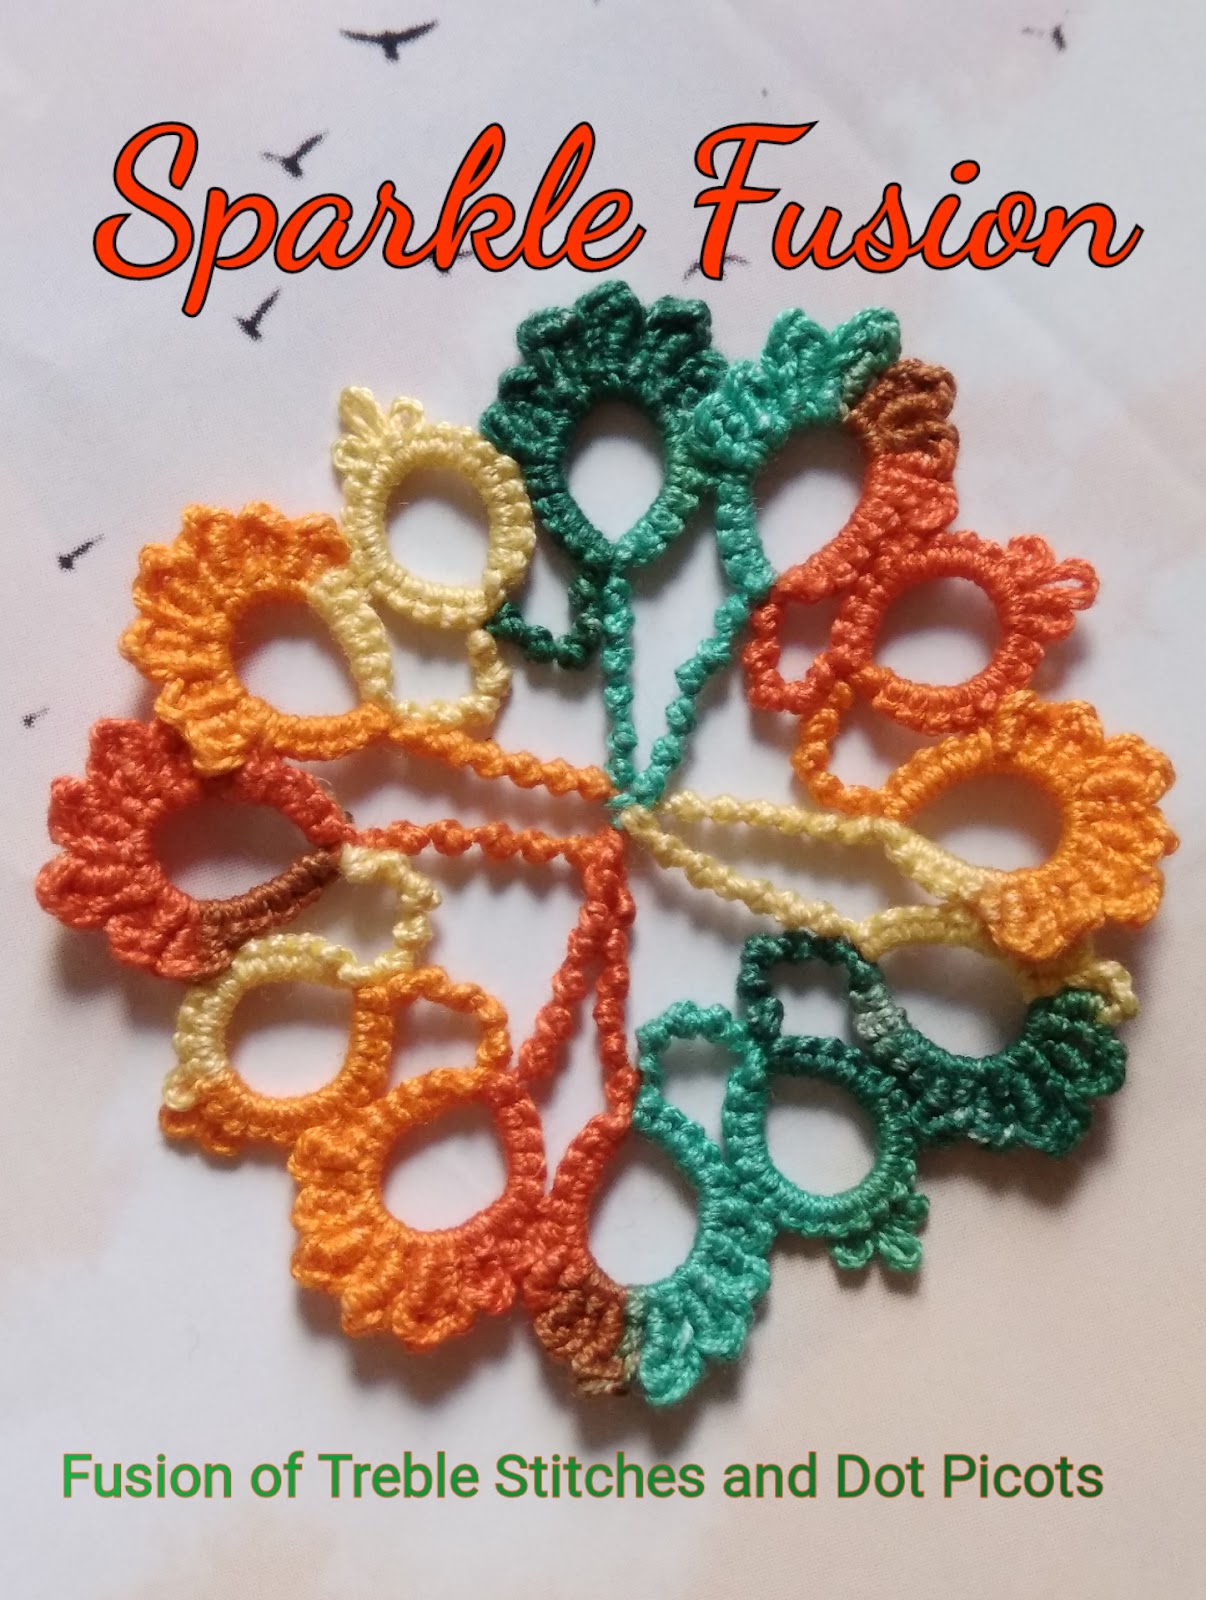
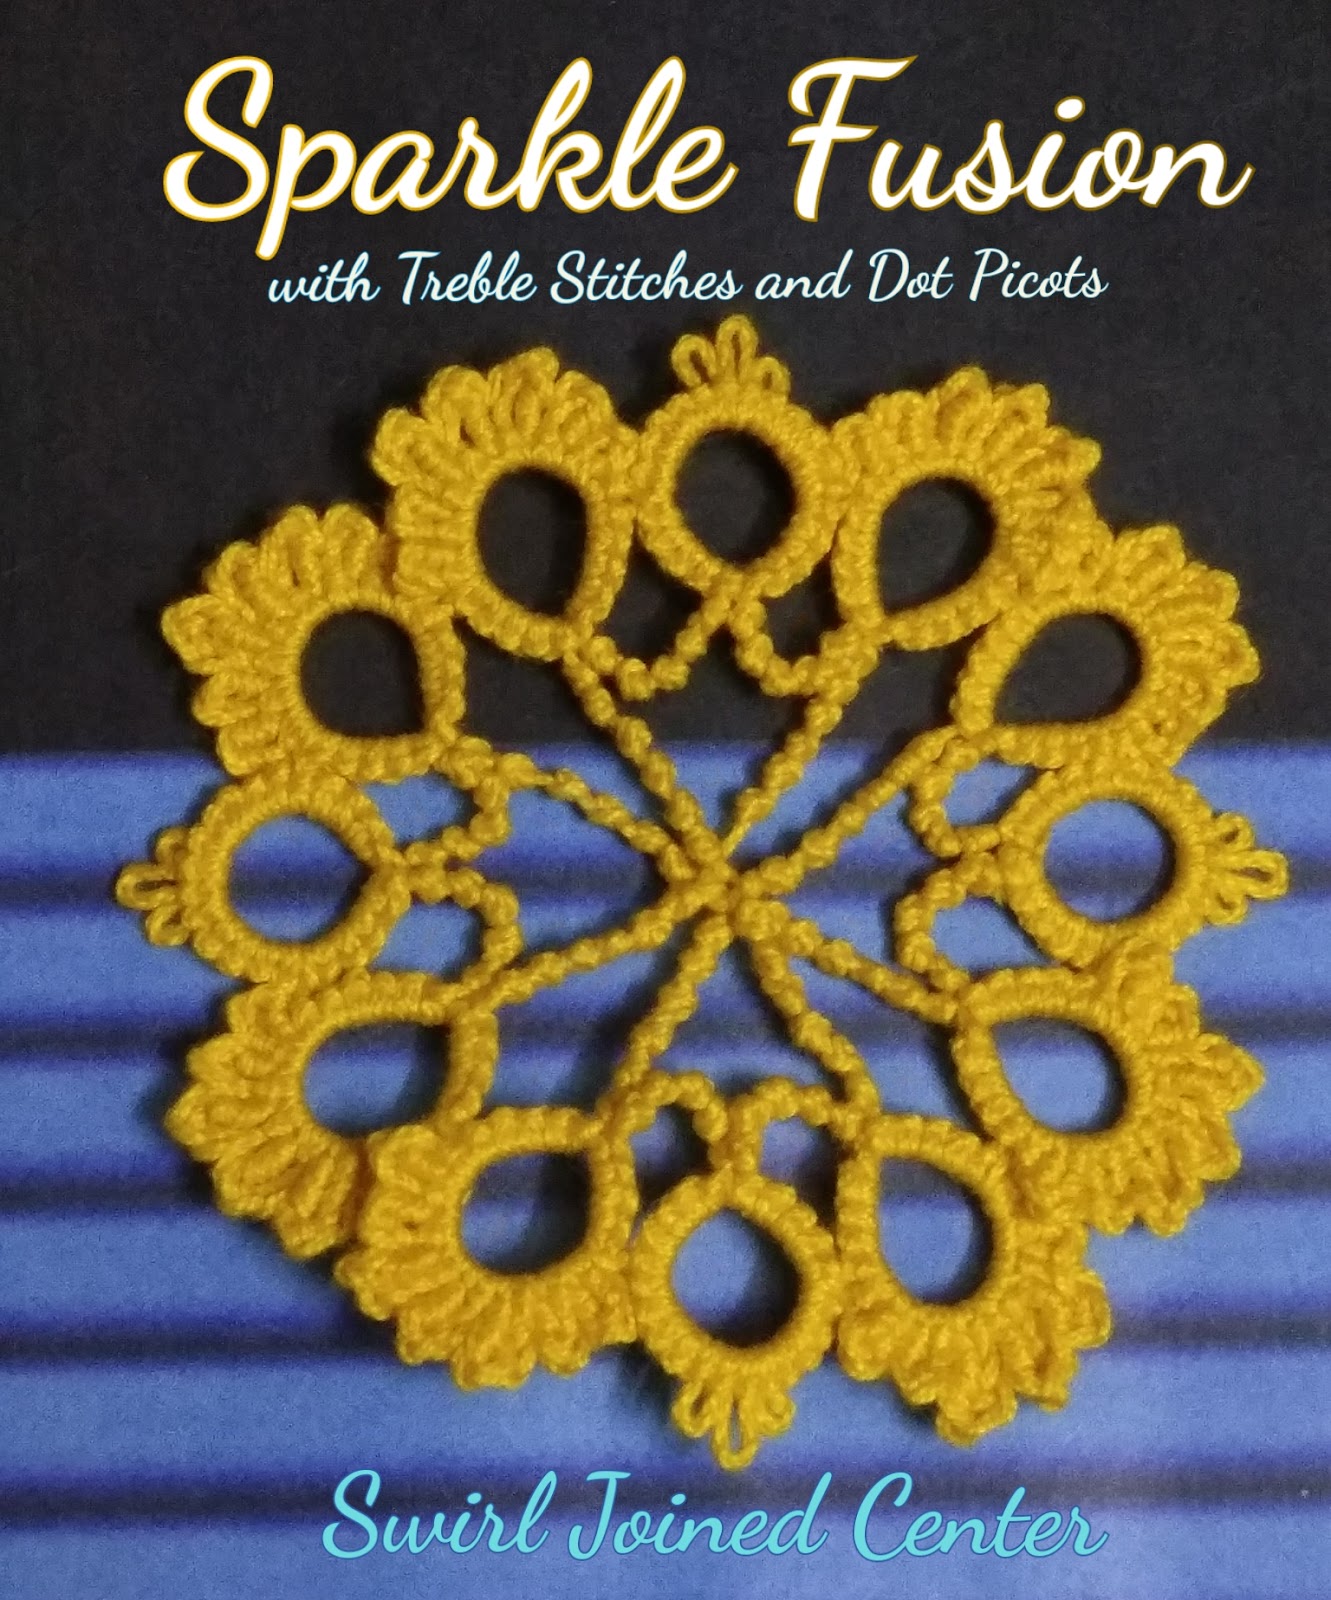
I kept watching Ninetta’s new Treble Stitches technique and patterns for a long time. I gone through Muskaan’s detailed study of the technique, but still I did not dare to try out Treble Tatting. One fine day I picked up a filled shuttle, watched Treble Tatting video and came out with a lace … it was totally unplanned….

Yes, I tatted Dot Picot String in between the rings, replacing the bare thread and the result was fusion of two techniques. What a wonderful tatting technique by Ninetta!!!! I managed to learn it easily from her video without trembling and would love to tat other treble variations.
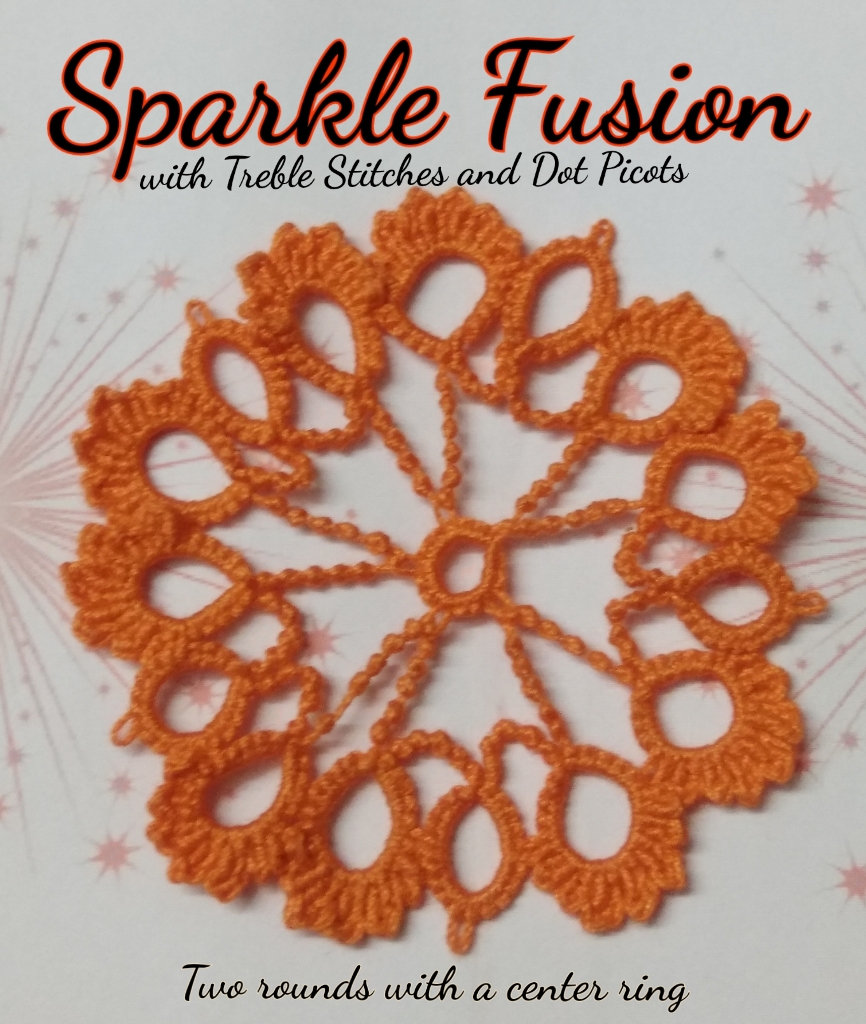
My next project - Sparkle Fusion-
  
Find Pattern here- Sparkle Fusion
Tip: Dot Picot String can be replaced by 
        1.Tiny beads or 
        2. Keeping bare thread or
        3. Tatting lock chain stitches by adding ball thread 
Muskaan accepted to test tat my fusion motif. She has already mastered the treble technique and tried out many variations which are posted in her blog.
Ninetta too suggested few important changes in the written pattern like the first treble stitch starts with vsp etc….
I thank Muskaan for being so helpful in test tatting and pattern corrections. I thank Ninetta for sharing her wonderful Treble Tatting technique through videos and her blog. Also for helping me finalize the Sparkle Fusion.
Two variations with different centers as explained in PDF pattern.


HAPPY TATTING ……...


Tuesday, 24 July 2018

Delighful Effects of CWJ

Dear friends, keeping in mind the soon approaching Indian festival of Rakshabandhan,
I found some new ways to use tatted motifs for ‘Rakhis’. Rakhis are basically bracelets
made with silk threads in vibrant colors. A sister ties Rakhi on the wrist of her brother to
show her true love. Rakshabandhan is a festival of love and  joy.
My focus was on Catherine wheel join (CWJ) technique while tatting new Rakhi motifs
and these are the designs I came up with.
1. The Chocolatees…....
The chains in second round in these motifs are joined with CWJ.
The effect of the CWJ can be seen with clarity of picot in the first round.
2. The simple yet elegant……
The white shiny thread gives an elegant look. The joins are made with CWJ.
3. The bare thread delight…...
Here’s a variation of color for the same pattern. I am happy to share this new effect of
bare thread over the rings and CWJ. Many tatters hate bare the thread idea but I am
sure that they too shall love this effect. I will share the pattern in my next post.
4. Dot Picot Delight....
Simple motif with six rings with single color. Join contrast color for the next round using 
Dot Picot String on upper part of each Ring joined with CWJ 
5. Variation with BareThread…….
Bare thread and two CWJs on each ring with and without beads.
6. Sandwiching the bare thread….

In the above two, one more round of chains with and without picots is added over the bare thread. 

The strings of all Rakhis are tatted with different techniques like Lock Chain Stitch, Pearl Tatting, Shoe Lace Trick etc.

Kindly post your views, comments, suggestions here.


HAPPY TATTING……………….


Tuesday, 17 April 2018

Dot Picot Cross for Georgia


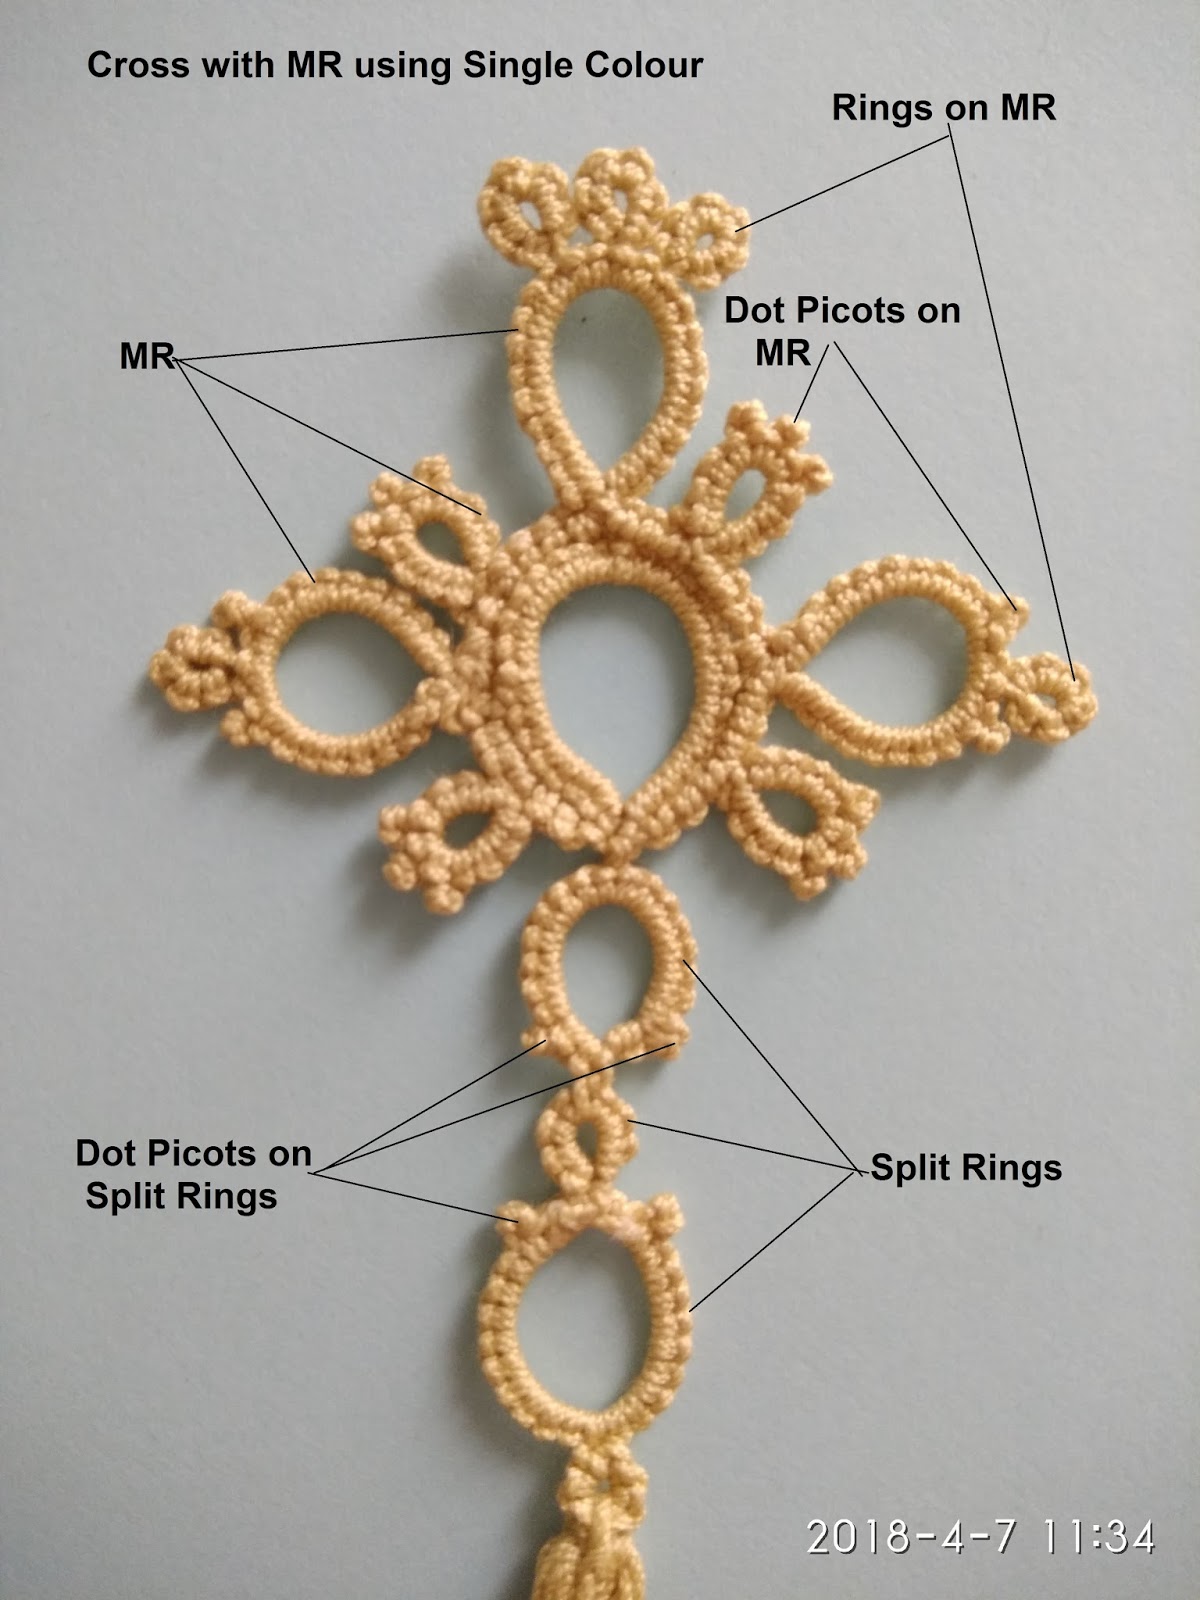
What a wonderful experience I had while working on The Cross diagram. The original idea of Georgia Seitz, Diagram by Jane Eborall, Muskaan’s help for finalising the pattern and there emerged a beautiful Dot Picot Cross with variations for the Online Tatting Class.
We had a great time learning the pattern and exploring new ideas with Georgia and other experienced tatters in the class today.
The Dot Picots give a graceful and ornamental look to the cross.

Original Cross idea from Georgia               Diagram by Jane Eborall


The PDF Pattern here-- Dot Picot Cross
      
The Pattern was so beautifully designed by Georgia, I could not resist trying out variations. 
The mock or floating rings on the center large ring and split rings at the bottom  have Dot Picots tatted with SCMR, Dot Picot on a Ring, ROR method. The two colored cross needed Double Core split rings instead of normal split rings.
See the detailed notated pics below…...


The cross with beads replacing the Dot Picots looks stunning too.

Close up of Beaded Cross
Another variation, I tatted a simple cross in two colors with normal picots and used a Triple Picot in the center top ring to give more decorative look to the pattern.

I wish you all try this lovely Cross pattern n enjoy tatting many more variations of your own.

Thank you so much

 Georgia, Jane and Muskaan

 for helping me complete this Dot Picot Cross Project with ease, creativity and perfection.

Do write your opinions, comments, suggestions here…..

HAPPY TATTING to ALL.


Tuesday, 3 October 2017

Wear them on to your spects.....

Hi all
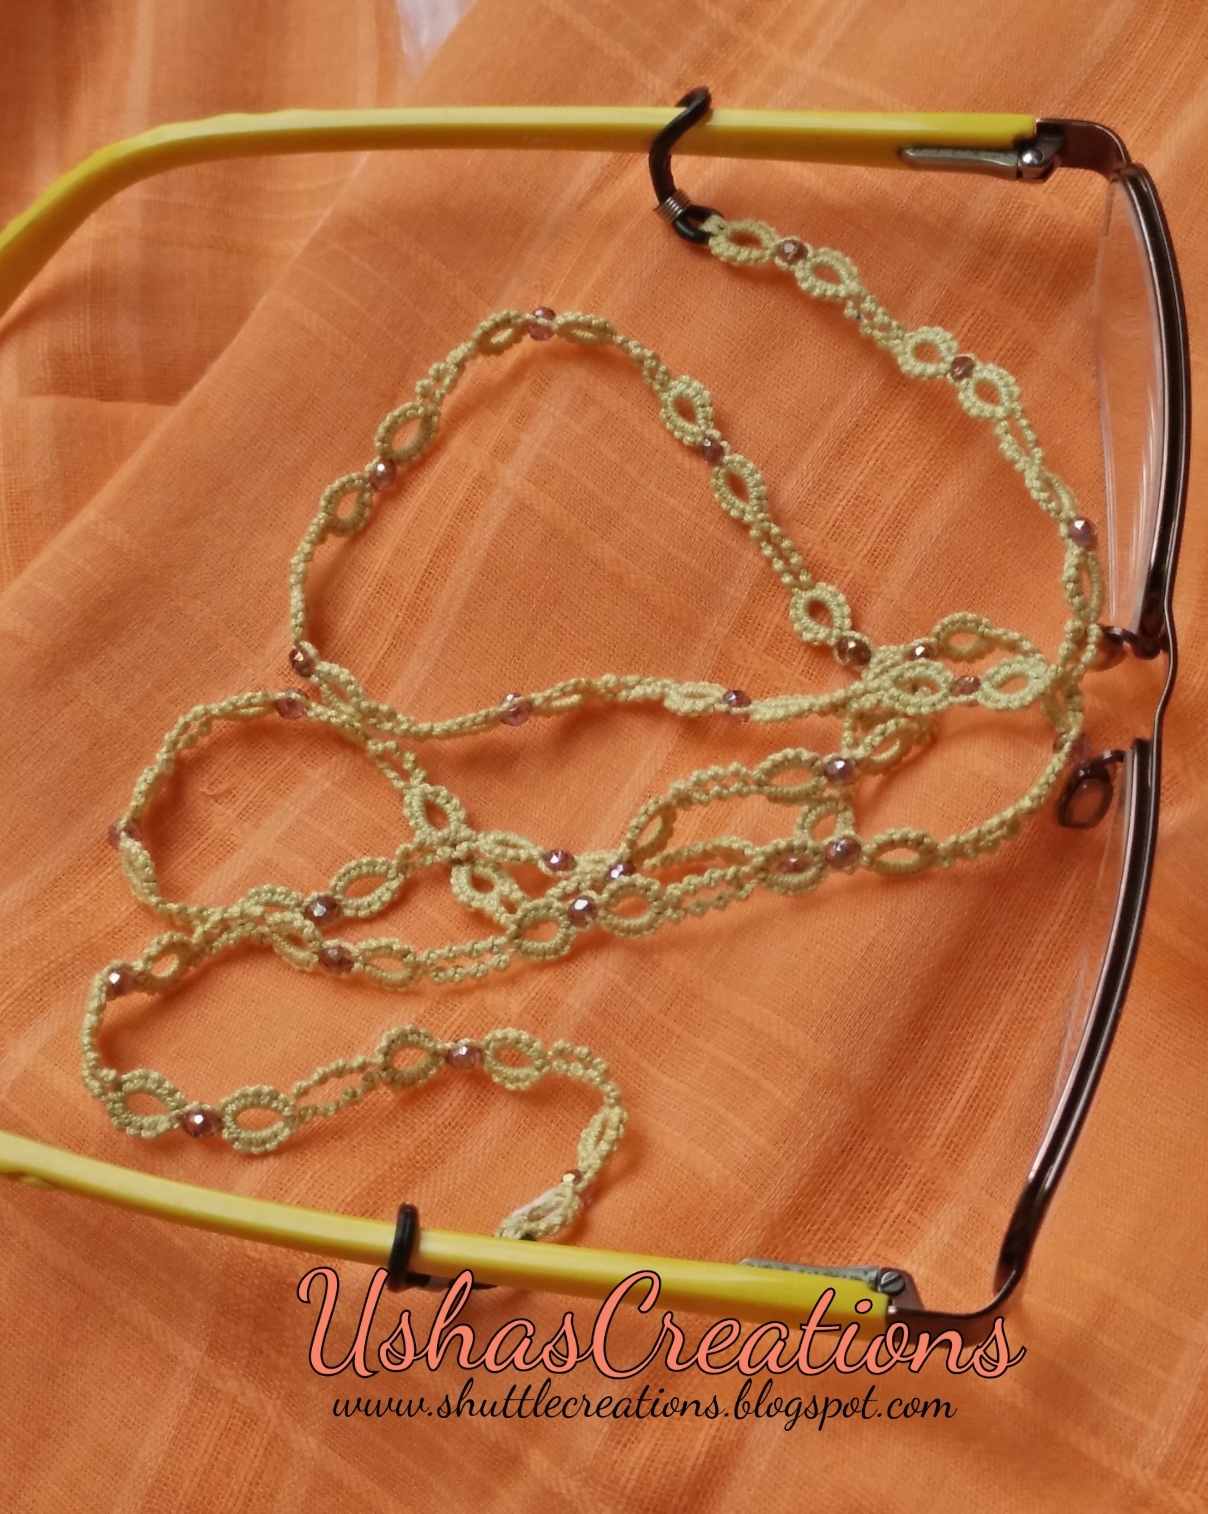
Back again and sharing my new lanyard patterns with you. Earlier I posted patterns with split rings and beads in My Lanyards. When it was discovered that the Dot Picots can be tatted on bare thread, I tatted  laces on a single shuttle. The same method of stringing Dot Picots is used for spectacle strings, all tatted in Anchor thread no.20. You can zoom in on my working pics for a closer view.
Lanyard No 1
A Combination of Split Rings, Dot Picot String and crystal bead is used in this lanyard. The cocktail colour crystal goes well with lighter shade of the thread. As seen in close up pic below, the crystal bead is strung and dot picot strings are tatted individually on each shuttle in between two split rings alternatively.
Lanyard 2
A dark purple thread with white crystal used in this lanyard. The crystal strung in middle of the Dot Picot Strings gives a different design pattern.
Lanyard No 3
Here the variation is in beads too.  Two tiny maroon beads on both sides of each golden bugle bead are arranged to avoid the latter from cutting through the thread. Small split rings of 2/2 ds tatted on either side of beads and Dot Picot strings.
Lanyard No 4
Yellow transparent big beads contrasting with thread color blue. Dot Picot Strings are followed by the bead and split ring.

Dot picots in tatting are very convenient to use anywhere and in any application. Why not try them now?

Happy Tatting........