Pages

Showing posts with label thrown rings. Show all posts

Friday, 25 October 2019

Bookmark these daisies………

Tatters need to empty shuttles every time to take up new projects 
which may result in beautiful lace or motif patterns. 
My emptying shuttles resulted in…………………
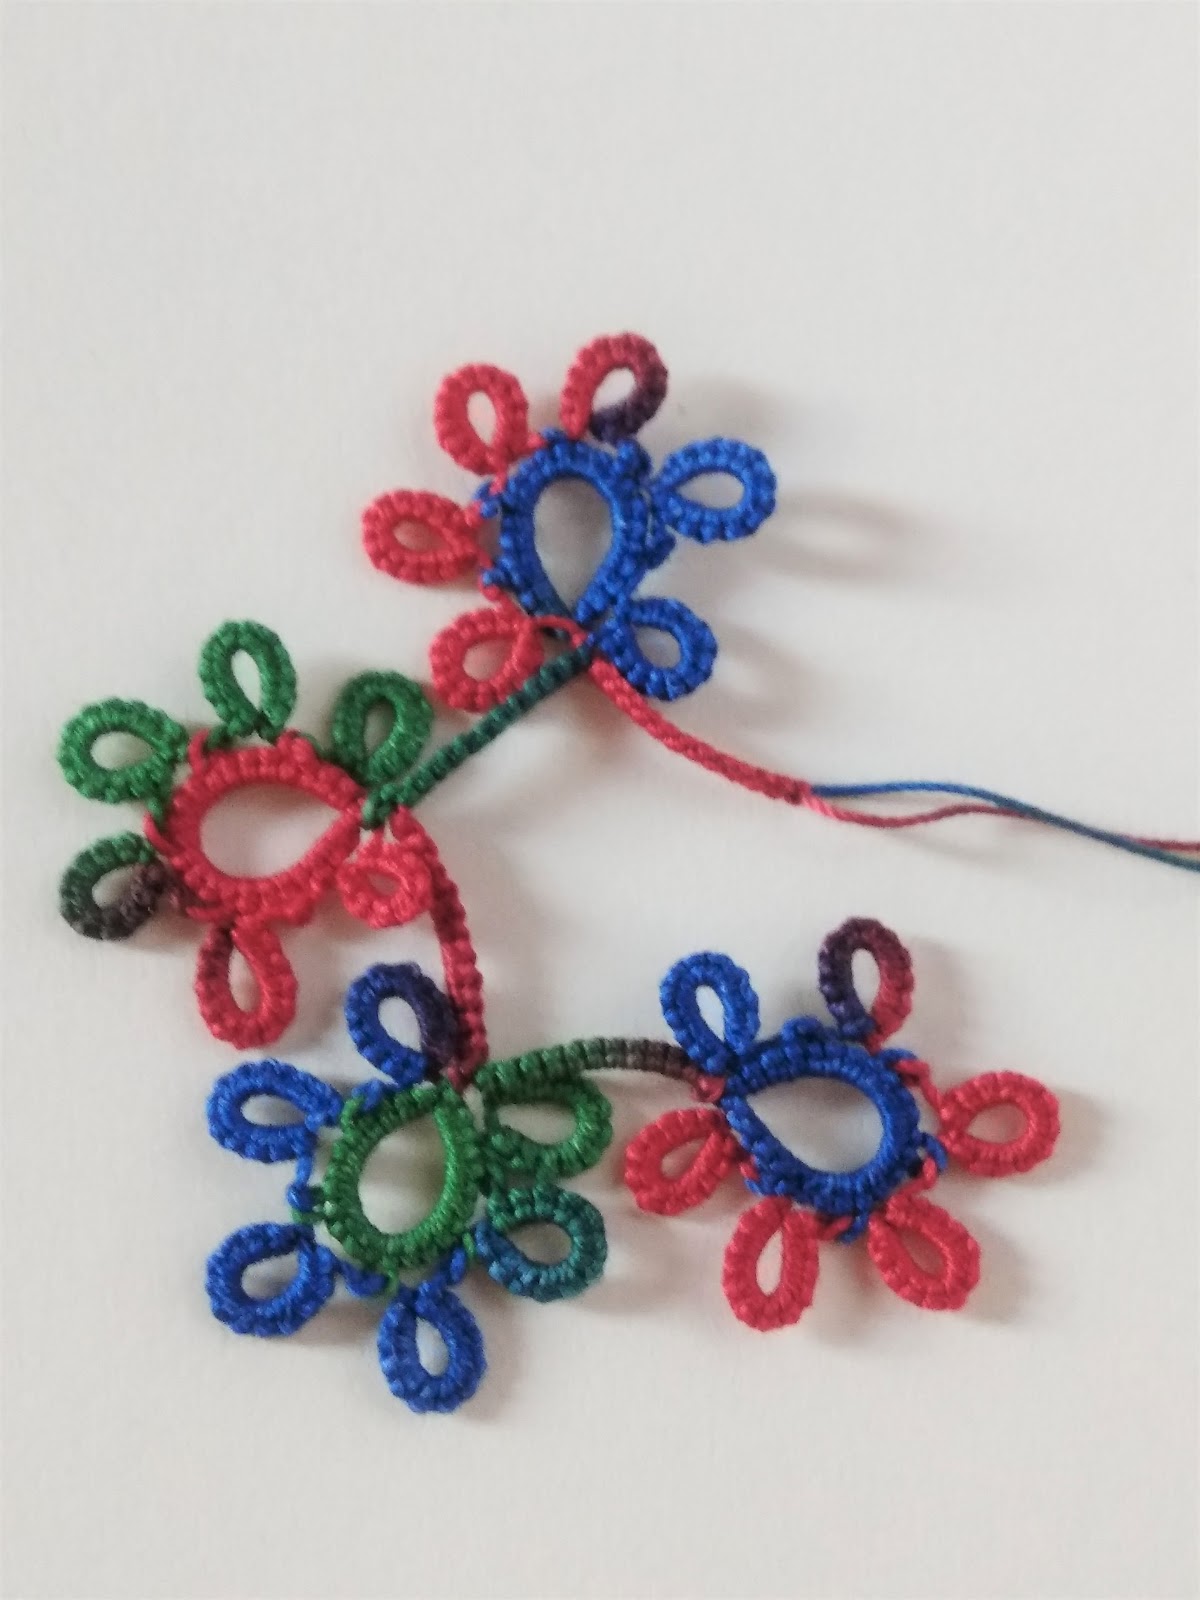
First try with single variegated thread  
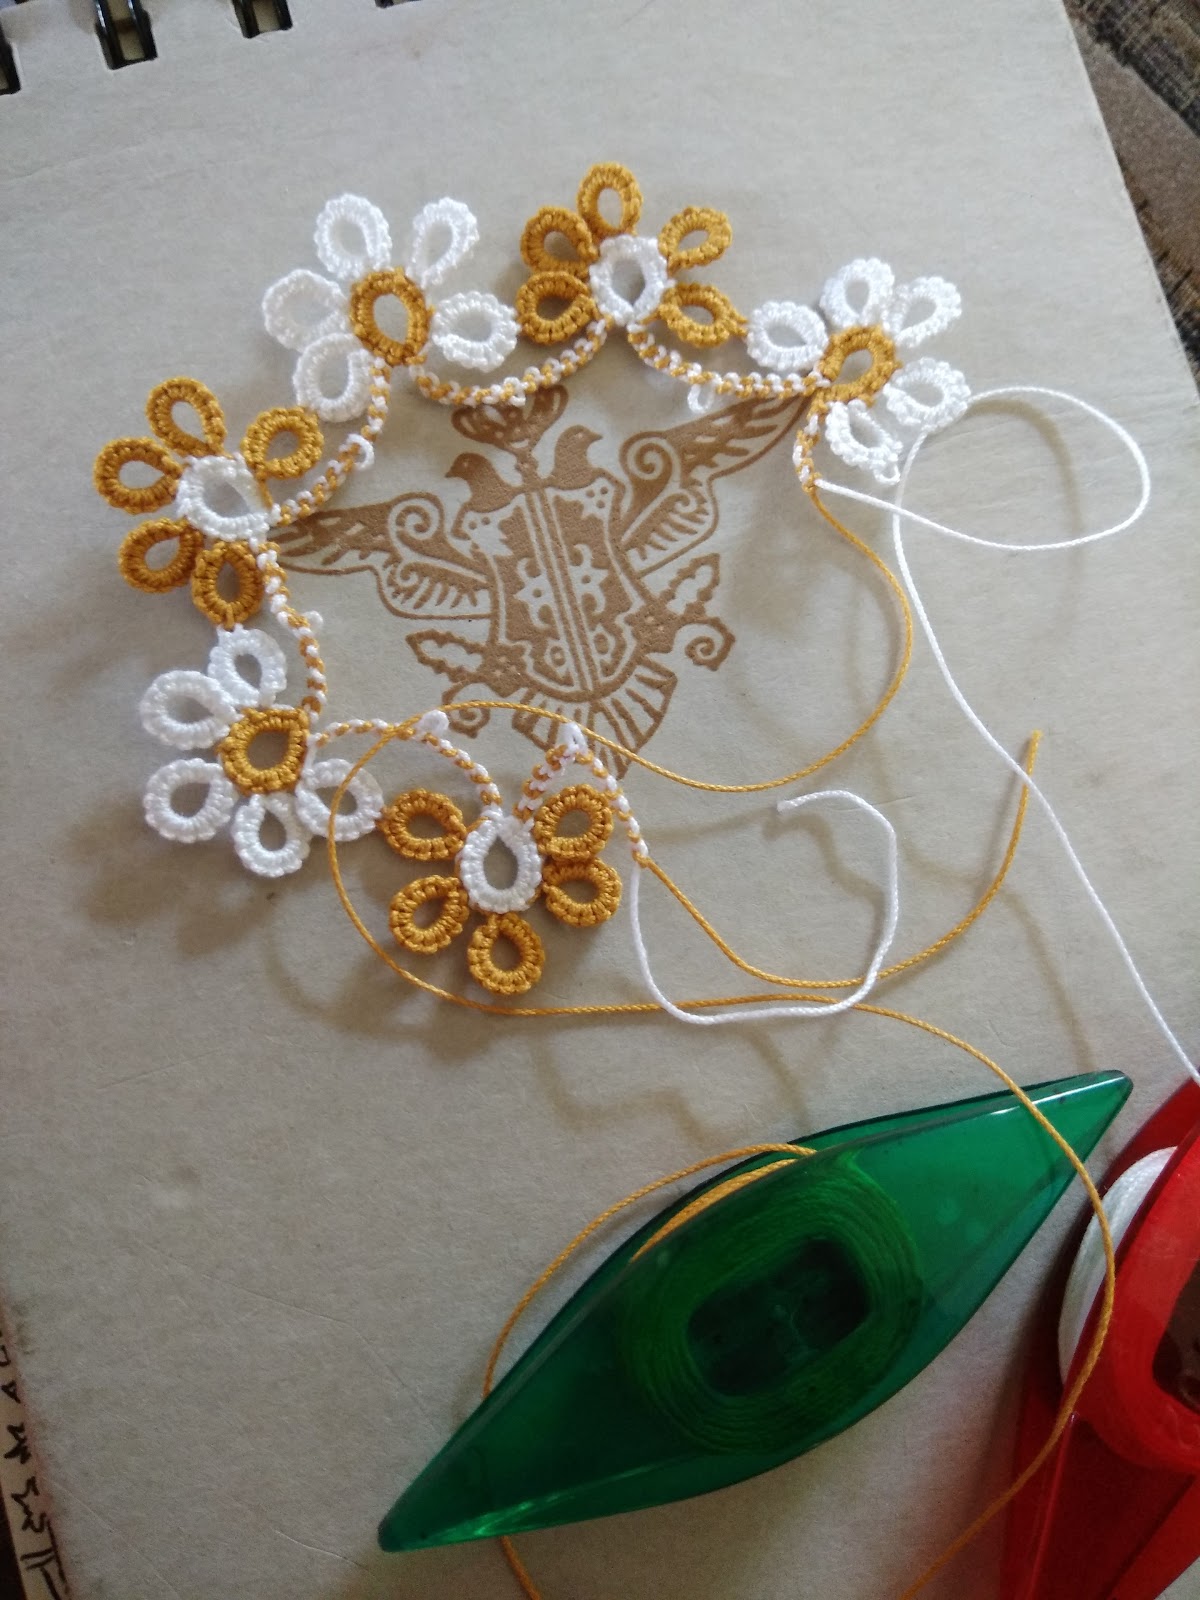
and another with two sold color threads.
My tatter friend Madhur reminded me that the motif which 
came up was exactly same as the first two rows of her Unending Doily. 
What a coincidence, she also tatted the doily to empty the shuttles. 
The first trial shows the bare thread over the center ring and shuttle 
join in each picot which are fairly visible.
In another attempt I used two solid colors where the pattern shows no 
bare thread nor any join. It was tricky to hide the bare thread 
and tat without joins.
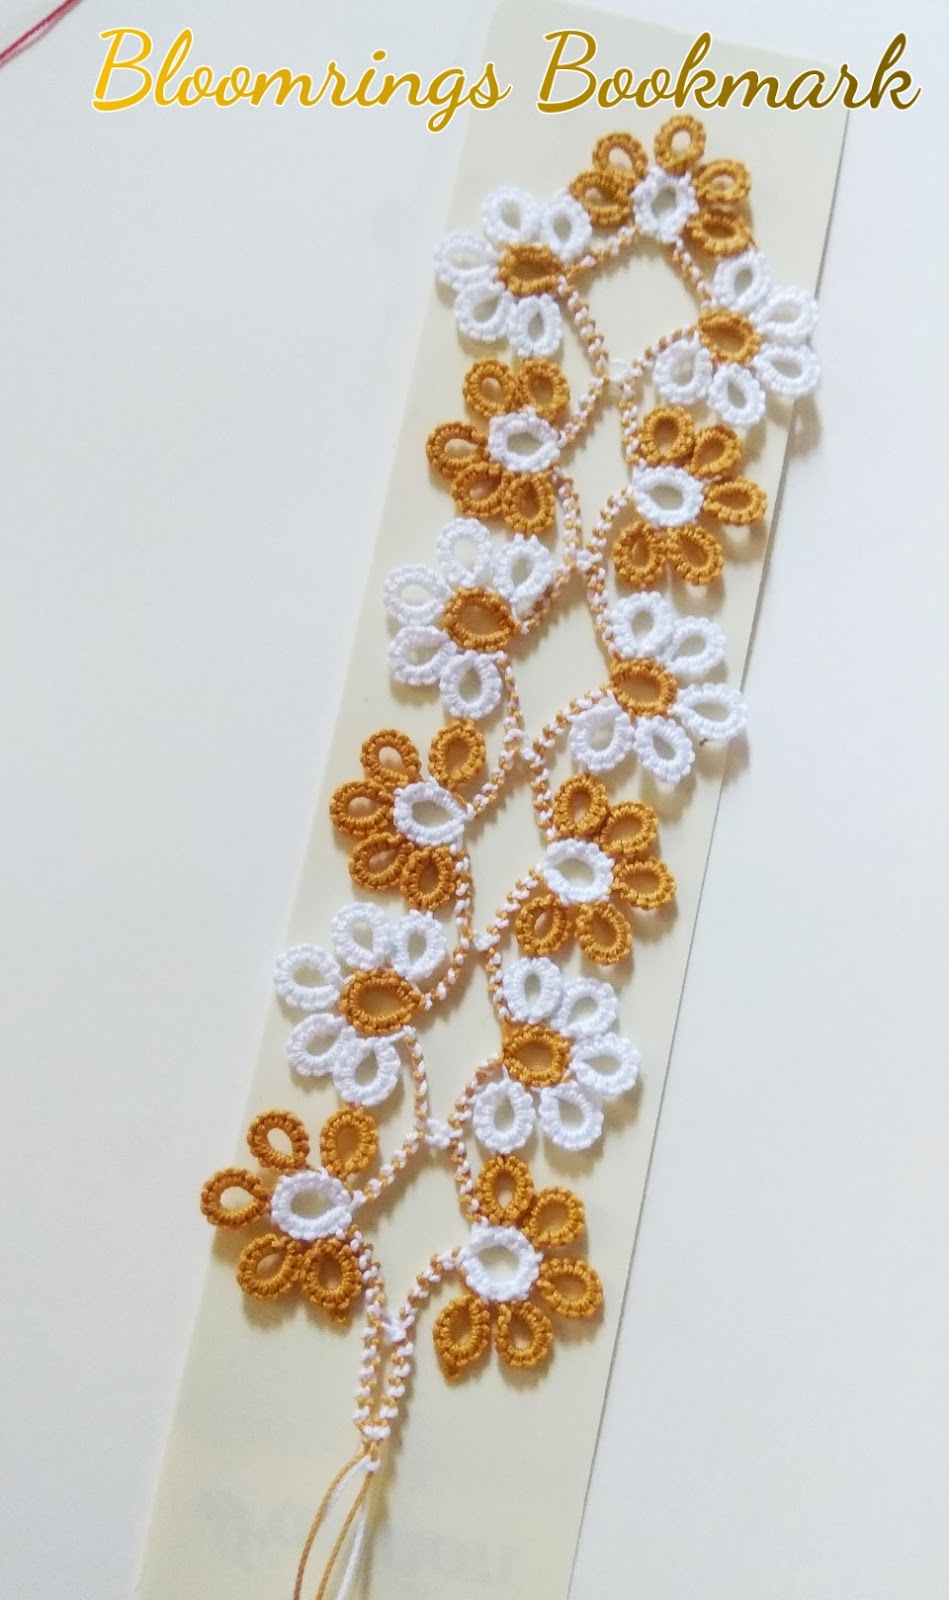
Finally it ended up in Bloomrings Bookmark pattern 
Bloomrings Bookmark pattern - PDF 
This pattern is tatted with Hidden Picot method for rings and 
lock chain stitch method for joining the motifs.
Hidden Picot(HP) is a very very small picot, automatically made 
between the double stitches and hidden behind the thrown rings 
off the center ring.
From my Indian Happy Tatters Group, Magnus tried this pattern 
and came up with this attractive color combination.
This is not a test tatted pattern but hope you find it easy to tat.


Your valuable suggestions and comments are always welcome.


Wish you all……………..HAPPY TATTING.......... 


Saturday, 5 May 2018

The Joining Effect!!!


I am happy to share Charming Frills, the stunning effect created out of the combination of Long Picot(LP) and Catherine Wheel Join(CWJ).
The idea of this pendant  came up after tatting the basic onion ring in two colors. 
My first version was…....

Georgia’s Reaction after seeing the pic was…...
“OH how intriguing! I see a vague resemblance to needle lace and frisaso de valladolid but I have not seen in tatting as far as I can remember.”
 She found some resemblance to needle lace because of the frilly look of the pendant.

Muskaan helped me to find references of the effects of long picots tatted by other tatters. I started writing the pattern for the pendant with her. We both had lots of discussions online for naming this frill effect. Finally I used the notation lp_cwj for the presentation purpose. Layered long picots with Contrasting thread colors added beauty to the tatted pendant. The long picots tatted in multiples in consecutive layers gave beautiful frilled edging. This combo of Long Picot and CWJ can be used as a filler, multi-tiered, or as a frill/fringe.

Other joins like
1)    Catherine Wheel Join in Round 2
2)     Alligator Join in Round 3
3)     Picot Join in Round 4  
have been used along with other techniques like Thrown Ring, Split Chain, Shoe Lace Trick and Switching Shuttles to tat in one pass.

Picot on the thrown ring can be used to add a jump ring, a pendant hook or an earring finding.


Working of this joining effect - lp_cwj is shown in the pic below.
This frilled pendant is tatted in five rounds. Rounds 1-3 are worked in clockwise direction; round 4 moves from left to right and Round 5 moves from right to left, when seen from the front.

The detailed PDF Pattern Link - Charming Frills with step by step pics.


Its important to note the working of round 5, where we have to make the joins through the orange bars seen on backside. Insert a crochet hook through the orange bar from behind, pull up a loop to proceed.
Loads of thanks to Muskaan for test tatting Charming Frills and the immense help in finalizing the pattern. Kindly check her blog  to see her version of Charming Frills.
Using the same effect of lp_cwj, I tatted a medallion- Fringed Petals


I invite tatters to test tat this medallion.
kindly e-mail me - shuttlecreation@gmail.com
Feel free to post your comments , suggestions here.

HAPPY TATTING .......always.............

Tuesday, 17 April 2018

Dot Picot Cross for Georgia


What a wonderful experience I had while working on The Cross diagram. The original idea of Georgia Seitz, Diagram by Jane Eborall, Muskaan’s help for finalising the pattern and there emerged a beautiful Dot Picot Cross with variations for the Online Tatting Class.
We had a great time learning the pattern and exploring new ideas with Georgia and other experienced tatters in the class today.
The Dot Picots give a graceful and ornamental look to the cross.

Original Cross idea from Georgia               Diagram by Jane Eborall


The PDF Pattern here-- Dot Picot Cross
      
The Pattern was so beautifully designed by Georgia, I could not resist trying out variations. 
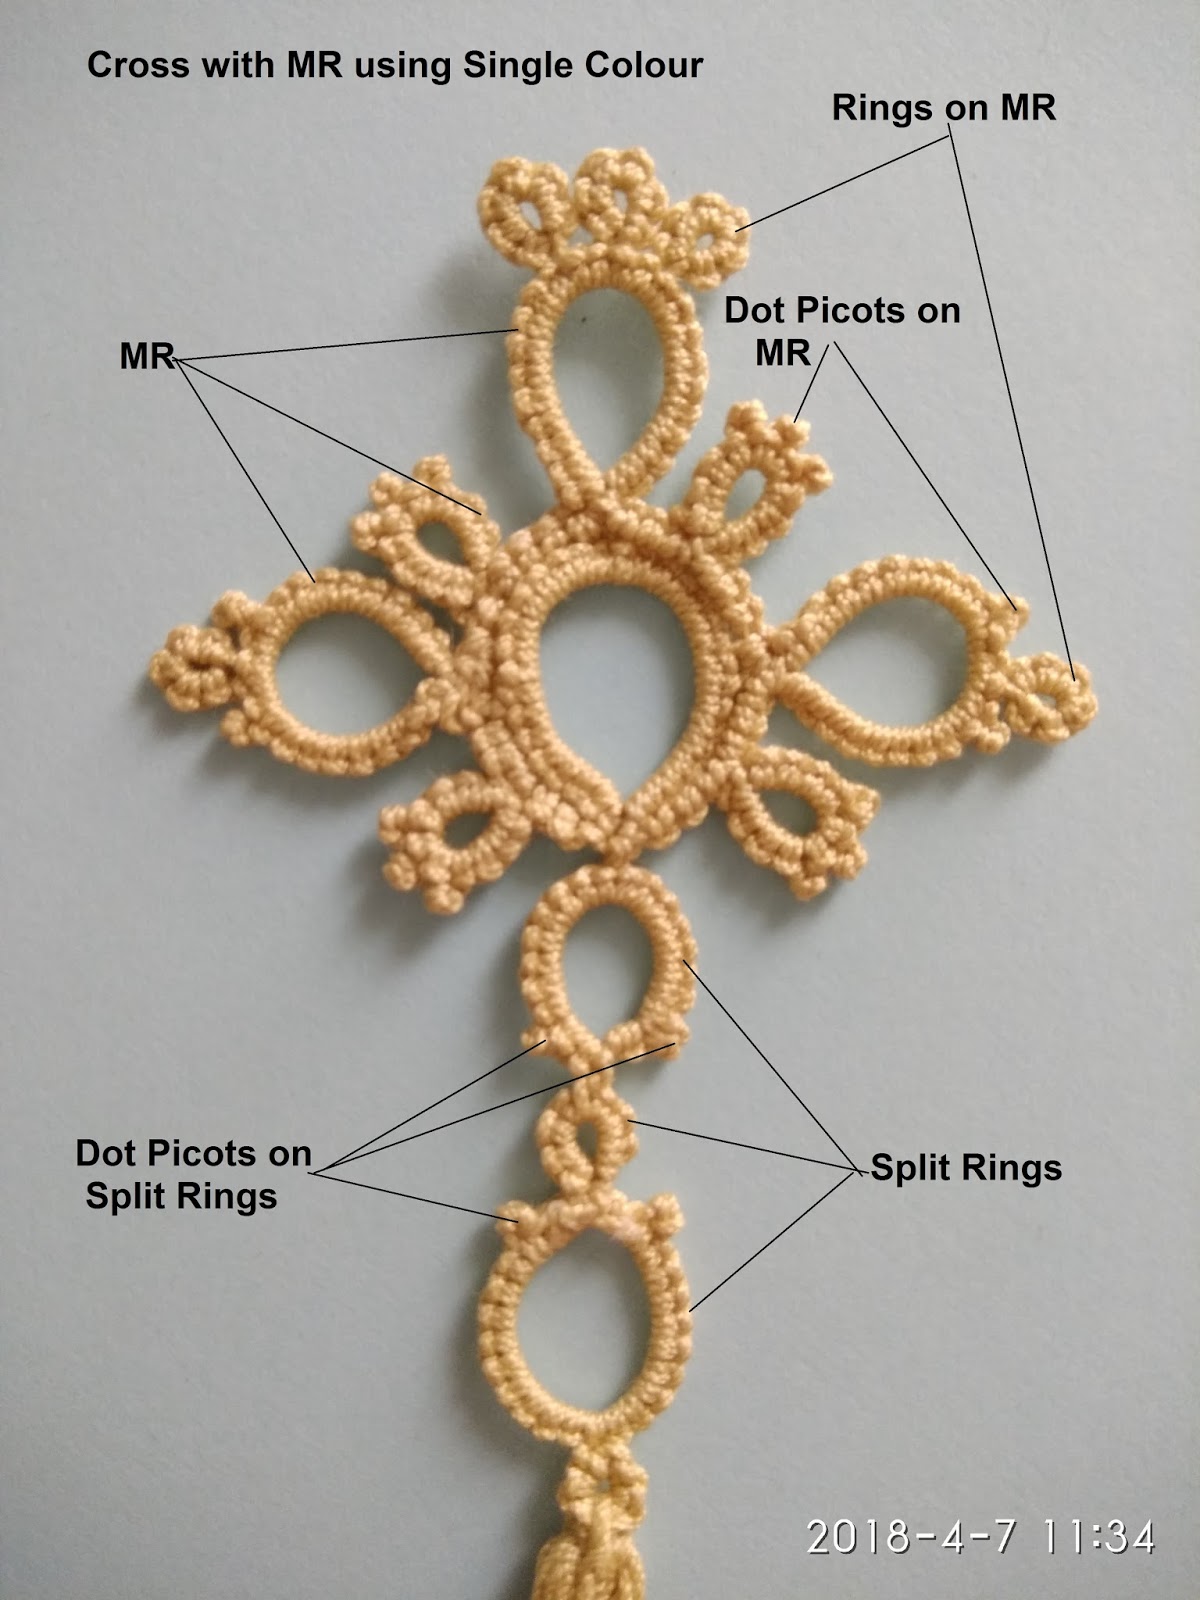
The mock or floating rings on the center large ring and split rings at the bottom  have Dot Picots tatted with SCMR, Dot Picot on a Ring, ROR method. The two colored cross needed Double Core split rings instead of normal split rings.
See the detailed notated pics below…...


The cross with beads replacing the Dot Picots looks stunning too.

Close up of Beaded Cross
Another variation, I tatted a simple cross in two colors with normal picots and used a Triple Picot in the center top ring to give more decorative look to the pattern.

I wish you all try this lovely Cross pattern n enjoy tatting many more variations of your own.

Thank you so much

 Georgia, Jane and Muskaan

 for helping me complete this Dot Picot Cross Project with ease, creativity and perfection.

Do write your opinions, comments, suggestions here…..

HAPPY TATTING to ALL.


Friday, 2 June 2017

Enchanting Square

Hi Tatters
Here is my new square motif tatted with old technique of Dot. Dot is a vintage term used for tiny rings of up to 4 or 5 stitches only. Muskaan too has explained Dots in her blog. I have used rings of only two double stitches.
The motif is made up of two rounds, tatted continuously. 
The first round is large ring with long and regular picots. It can be tatted as a SCMR, too. If using 2 colours, one can tat this ring separately. 
The second round has tiny ‘dots’ in between four arms with floating rings. The dots joined to the center, are separated by very short chains.
Muskaan has test tatted this motif and found it ruffled while working. She had to block the piece to lay it flat. In my opinion, if the motif is tatted with moderate tension of stitches, it doesn’t ruffle much. As I too had to press it before clicking the pics. I would recommend blocking the tatted motif for best results.
click here to download pdf  - Enchanting Square
Some close up pics given below, which I had taken while working on this motif.
                The motif looks beautiful in variegated thread.  Variation tatted in single color.
                                     
Your Feedback, Suggestions, comments are always welcome.  

Happy tatting...............                   


Thursday, 11 May 2017

The Dreamcatcher

Hello all

                                                 Pattern explained and updated on 25.05.2017-UPDATE
I am really thankful to Georgia Seitz for giving me the opportunity to explain my new Dot Picot technique in her Online Tatting Class OTC 2017 session. I hope some of you have tried the Dot Picot and now well acquainted with the technique. 
I shared the video with tatters in Online Tatting Class of how to make a Dot Picot i.e. a thrown ring of only one double stitch. Here is the link for the same -  How to make Dot Picots. 

Muskaan as you all know her, is a well experienced tatter who is the inspiration behind my blogging career. Muskaan helped me to prepare for the presentation for the class session. She drafted the layout and text of the PDF and drew diagrams for my Dot Picot Flower and Wonder Lilac Pattern DotPicotLilacPdf .She test tatted my both motif patterns and posted on her blog with perfect explanation. 
A must visit: thumb-nailed-it

I had posted some Dot Picot motifs in my previous blog Dot Picots Explained !!!!!!!!!
Today I am sharing with you the Dreamcatcher medallion having outer round of dot picots and layers of contrast thread colors tatted in different sequence of rounds.
The pattern shown here is for Blue and Golden Yellow Dreamcatcher. Other two color variations are shown at the end of this pattern.

The medallion starts with the 2 outer rounds in  blue, tatted continuously by climbing out with split rings. Next we tat the 2 golden rounds separately - first the outer one, then the inner one. Here, lock join threads are made visible purposely to enhance the beauty of this design. The Dreamcatcher is finished off with the central blue round of rings
                                    

Pattern for my Dreamcatcher motif:
 Two contrast shades of threads to show separate layers.
I have used Anchor 20 for both Blue n Golden yellow thread.
Detailed pattern given in this PDF Link
Updated Pattern 25.05.2017 in  PDFrevised

Few points to note:
       ʘ is a new symbol for  Dot Picot i.e. 1ds thrown ring on chain   
For  Round 1  Wind SH1 n SH2 Blue color CTM for rounds 1 & 2.  
                        climb out by tatting SR  and complete circle of 16 rings.

 Tat Round 2 with Dot Picots and thrown ring
       Round 3 is tatted over rings of second round in golden yellow
       Wind shuttle with golden yellow thread and leave attached to ball, do not cut
                      Let the joining thread be seen, to create V shape of joining thread
     Round 4 is joined over base of the rings of Round 1 using only single shuttle with
     golden yellow thread.Here joining thread to be seen
     Round 5 is tatted over base of rings of Round 4 in blue with only single shuttle.
          All rings should be tatted closer without gap.
                                                   Other variations in different colors


    Catch the dream to tat this medallion and let me know your experience !!!
   
     Your comments, suggestions are most welcome.

    Happy Tatting always………………..           


Wednesday, 3 May 2017

Dot Picots Explained !!!!!!!!!


Dear Tatters,

My Dot Picots have generated some interest in the last few weeks. This effect, along with practice pattern, will be shared with the Online Tatting Class soon. I take this opportunity to explain a bit of the background.

This new idea of making a single ds ring on chain came to my mind while working with two shuttles. To my wonder, a beautiful tiny dot was created and I just loved it. Instead of regular picots on a chain, I made tiny rings that sit above the chain. They are 1-stitch thrown (or thrown-off or floating) rings and since they are used in place of picots, 
I called them Dot Picots. Video Link on How to make Dot Picots updated on 27.05.17

What a fortunate coincidence !
Dot is actually a vintage term used for tiny rings of up to 4 or 5 stitches only. http://www.bellaonline.com/articles/art3217.asp

Dots are also described by Muskaan in her blog

So dot picot is basically a 1-stitch dot!
I practiced the Dot Picot by tatting self-designed motifs. 
Few of them shown below. First two patterns already shared in the blog. 
I will be sharing other patterns too.
 I also found that I could change regular picot motif into a dot picot motif too.
To name few, I tatted Rosemary Peel’s Heart
for transforming into Dot Picots.

 Dot Picots are not possible on regular rings. They require a second shuttle and can be done only on chains and mock rings.

Tatting designer, teacher Nina Libin says, "I think Dot picots are really good for edgings, while decorative long picots may get squashed or distorted with use, Dot picots will hold the solid outline"

My IndianTatting group friend Shalmali Bapat says, “I liked dot picots not only for its delicate look but the uniformity it gives. Else maintaining same size of simple picots is bit tedious.”

As long as one is using 2 shuttles, decorative picots in any pattern can be converted to dot picots for an alternative effect. It will give your tatted work an ornamental look and they look like tiny beads.

Lets try to tat a dainty Dot Picot step by step
ʘ symbol denotes 1 dot picot
                                           
Take two shuttles SH1 Blue, SH2 white (See Pic 4)
Start *R 5ds, Long picot for center, 5ds cl. RW.
Start  Ch 6ds, drop SH1, With SH2 make ʘ (dot picot is a ring with 1ds, cl), 
pick SH1, ch 6ds. RW

Continue from * three more times, joining all rings in center picot.
 Tie n cut threads.

Before I shared Dot Picots online, I didn’t know much about the symbols and terminology in tatting. Experienced tatters Muskaan, Georgia Seitz and Nina Libin helped me a lot in choosing perfect symbol for the Dot Picot. They also guided me about already existing terms on similar technique like Dots, Knotted Ring Picots etc.

Karen Cabrera has tatted the same picots differently leaving bare thread on both sides of the double stitch, such that the tiny 1ds ring floats at a distance. 
She called it Knotted Ring Picot in her Tatting Lesson 141. 

And here is a comparison of knotted ring picots and dot picots used in the same motif I shared above.
                                            
                                    
You can make out the difference between two types of picots in above pic. Karen has left some bare thread before and after making a double stitch. The ring is at the tip of a picot.

The Dot picot exactly sits on the chain without any gap, an easy alternative to beads.

So start working on Dot Picots now!!!

I welcome your comments, queries, suggestions.

Happy Tatting……….